Layout Builder Magic (LBM) User Guide (Version 1.3.0)
This user guide describes features available in the latest current version (1.3.0). If you are running an older version of LBM, please install the update now: Layout Builder Magic Update Page. To Navigate this user guide, click the ≡ hamburger icon fixed at the top-right corner of this page.
About Layout Builder
Layout Builder Magic allows you to compose a modern, responsive layout visually inside Dreamweaver. If you use a recent version of Dreamweaver, think of LBM as a leaner, automated alternative to Bootstrap—an alternative that gives you the ability to set important page styles, including colors, from inside a visual user interface. There has never been a layout tool so powerful available for Dreamweaver.
Looking for LBM Components?
We also have add-on components available for Layout Builder. Learn more here...
Installing LBM
Extension installer files come in 2 formats: MXP and ZXP. MXPs are supported by Extension Manager versions MX, MX2004, 8, CS3, CS4, CS5, CS5.5 and CS6. ZXP is supported by versions CS5.5 and higher. Version CC and higher have dropped support for the MXP format. To continue to support all Adobe customers, regardless of version, we include both the classic MXP and the new ZXP versions.
Dreamweaver CC 2015 (and higher) Extension Installation Information
As of CC 2015, Adobe has ceased to support its own Extension Manager. Use the PVII Extension Manager for Adobe Creative Cloud
PVII Extension Manager for Adobe CC
( Windows and Mac)
Download and Install Instructions
Work in a defined Dreamweaver site
Before you begin, make sure you are working inside a defined Dreamweaver web site. This is necessary so that Dreamweaver knows how to link required assets. If you are new to Dreamweaver or need to learn how to define a web site, please see the documentation that came with your copy of Dreamweaver.
Opening Layout Builder Magic
If you are using Layout Builder Magic on a new page, or for the first time on an existing page, simply click anywhere on the page in Design View. If you are inserting a new LBM instance inside an existing LBM structure, or nesting a new LBM inside an existing one, click where you would like the new instance.
Note: in most instances, nesting is not necessary. Most design tasks can be accomplished without nesting.
Open the LBM user interface
There are 3 ways to open the UI. Choose the one that best fits your workflow...
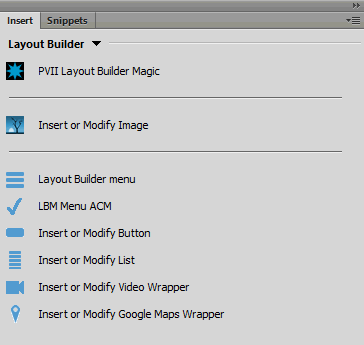
1. Click the LBM icon (Blue Star) in the Layout Builder of Dreamweaver's Insert Bar or Insert Panel.
Note: The screen captures below show the various menus and panels with the Layout Builder Magic Components installed. If you do not have the Components your menus will only show the PVII Layout Builder Magic and Insert or Modify Image entries.
Insert Bar
![]()
Insert Panel
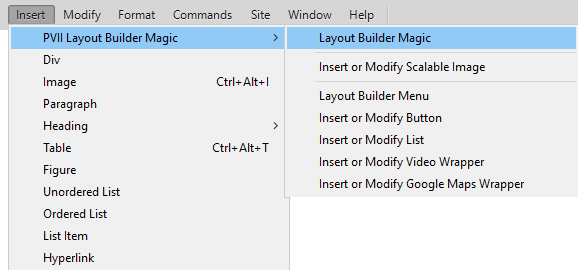
2. Open the Insert Menu
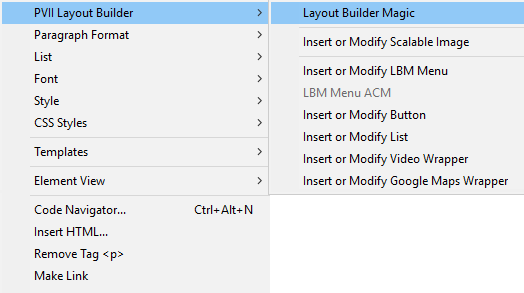
3. Right-Click on your page
Place your cursor on your page where you want a new LBM instance or image to go, or inside an existing LBM instance or image that you want to edit, and right-click. Choose PVII Layout Builder Magic to open a flyout menu containing links for the main LBM UI or any LBM tools.
The LBM interface will open in the Create or Modify mode., depending on whether you are creating a new LBM layout or editing an existing one.
The Create Mode Interface

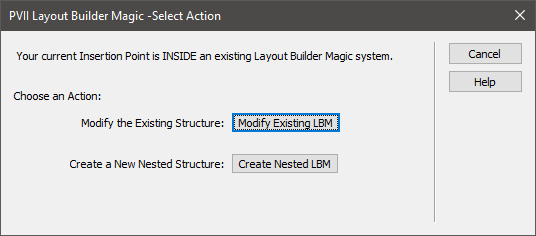
If your cursor is inside an existing LBM, an intermediary dialog will open, asking if you want to Modify the Existing LBM instance, or create a new one:
The Modify Mode Interface
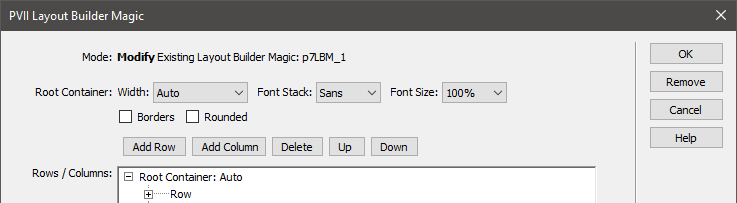
Note that the Modify UI adds a Remove button. Use this button to remove the entire current LBM instance. If there are any nested LBM instances inside, those will also be removed. If there are no LBM instances remaining on your page after removal, the links to any LBM CSS files will also be removed. The actual CSS files will not, however, be deleted from your p7lbm folder.
Asset Folders
When you create an LBM layout, the system creates an assets folder named p7lbm at the same level as the page that contains your LBM instance. This folder will contain the LBM CSS files.
When you publish your site, make sure you upload the entire p7lbm folder.
Using the LBM User Interface
The LBM interface contains all the tools you'll need to lay out an attractive, modern, and responsive page.
From the top...
Let's explore each section of the interface and the options they support.
Root Container Specific Settings
The root container is the outer DIV that surrounds, or contains, the entire LBM structure. In this section, we can set the Width, Font Stack, Font Size, as well as borders and rounded corners. There are several settings reserved only for the root container. These settings are placed near the top of the UI, above the Rows/Columns listing.

Tip: If you are creating an entire page using LBM (a very wise decision), you can treat the Root Container element as you would the Body element, as far as styling goes.
Width
Width can be set to one of 7 values:
Auto, 1600px max, 1400px max, 1200px max, 1000px max, 940px max, and 800px max.
Auto is, of course, the same as 100%. Your layout will be full screen width. All other values are max-width, meaning that your layout will adapt to the width of the screen, but will never exceed the max-width that is set.
Font Stack
The efficient way to set font-family is on the root container. That way, all of your text will look consistent and you will not need to set font-family multiple times. There are 5 settings to choose from;
Auto, Sans, Serif, Thin, and Fancy
Each setting is defined by one of the CSS classes below:
.lbm-stack-sans {font-family: Segoe, "Segoe UI", "DejaVu Sans", "Trebuchet MS", sans-serif;}
.lbm-stack-serif {font-family: Cambria, "Hoefler Text", "Liberation Serif", Times, "Times New Roman", serif;}
.lbm-stack-thin {font-family: Lato, "Gill Sans", Optima, sans-serif; font-weight: 300;}
.lbm-stack-fancy {font-family: Federo, "Gill Sans", Optima, sans-serif;}
The Thin and Fancy stacks are preset to easily work with a Google Font (Google Fonts). Simply change the first name in the stacks (Lato or Federo) to reflect your Google font. You will find the CSS rules in the custom style sheet file p7LBM-Custom-01.css in your p7lbm folder. If you wanted to use the Lato or Federo font family, you would add one of the following linked style sheet to the head region of your page source code:
<link href='http://fonts.googleapis.com/css?family=Federo' rel='stylesheet' type='text/css'>
<link href="https://fonts.googleapis.com/css?family=Lato:300" rel="stylesheet" type="text/css">
If you wanted to use a Google font called Andover for your fancy stack, you would place the appropriate Google font link in the head of your page:
<link href='http://fonts.googleapis.com/css?family=Andover' rel='stylesheet' type='text/css'>
And then change the first font in the fancy rule to Andover:
.lbm-stack-fancy {font-family: Andover, "Gill Sans", Optima, sans-serif;}
Font Size
Set a font size for your root container (and everything inside). Choose from the following settings:
Auto, 80%, 90%, 100%; 110%, 120%, 130%, 140%, or 150%
Borders and Rounded Corners
You can also set a 1px border around your root container and/or apply rounded corners.
Managing Rows and Columns
It's all about Rows and Columns, and LBM make it extremely easy to manage, maintain, and manipulate your columns and rows... visually.
The Rows / Columns List
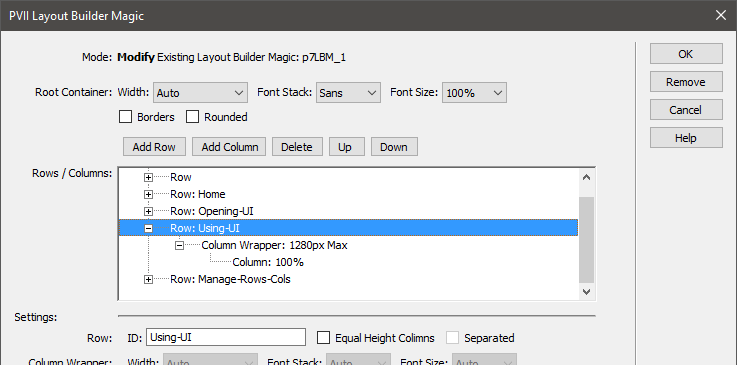
This is where it all happens, where you define the elements that give structure and shape to your page. The Row/Column structure descends from a single Root Container. In the above example, we see the word Auto next to the root. This means that this root container is set to auto width. Below the root, a tree view expands showing each row in your layout. Each row is always comprised of a row, a column wrapper, and at least one column, making it easy to track your layout. In our example, we've assigned IDs to each of our rows, which makes it even easier to figure out what each row contains. You can assign IDs to your rows by typing into the Row ID box just below the listing. Looking at the row that is expanded in the listing, we also see there are other usable clues that LBM supplies to keep you oriented. The Column Wrapper, for example, lists its max width setting.
Managing Rows and Columns
Above the Row/Column listing are 5 command buttons. They are as intuitively logical as they look. They do exactly what they say they do. They allow you to Add a Row, Add a Column, Delete a Row or a Column, and move Rows or Columns Up or Down.
Managing Rows and Columns: Tips
When adding columns, set your column widths so that they equal 100%. Before deleting a column or row, remember that you will also be deleting the content inside them. If you want to preserve your content, make sure you copy it to a temporary location. One way to do that is to create a page called clipboard.htm, which you can use as a repository for temporary content.
You are only allowed to delete rows or columns, but don't worry, because the system will not allow you to delete Column Wrappers or Root Containers.
Row, Column Wrapper, and Column Settings
Below the Row/Column listing are the Settings and Styling options that are applicable. Selecting either a row, a column wrapper, or a column, in the listing makes specific settings and options available.
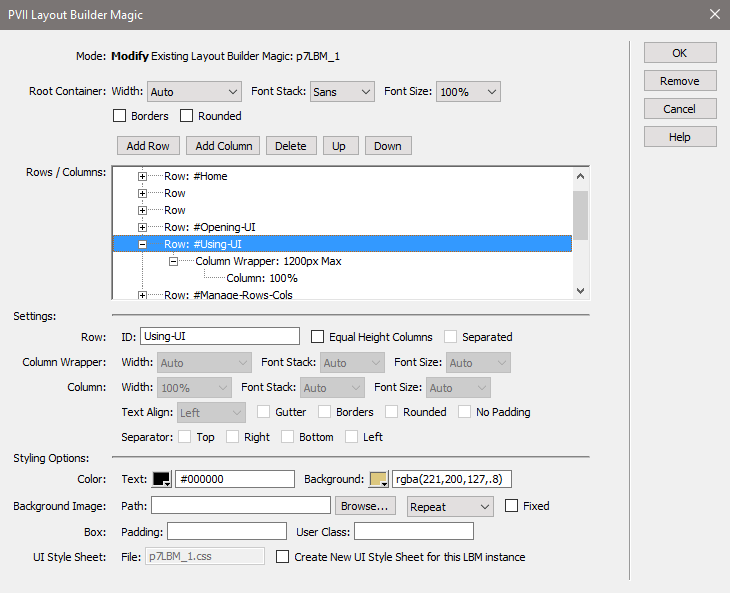
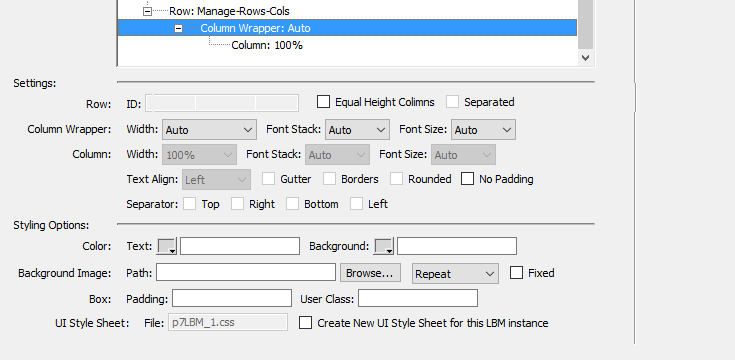
Row Settings and Options
In the above screen capture, a Row is selected, which makes certain options available, while others become disabled. When a Row is selected, the available options are:
- ID
Enter an ID for the selected row. - Equal Height Columns
If set, all columns in the selected row will be set to the height of the tallest column. - Separated
If Equal Height is set, this setting will display the columns in the selected row separated (with white space around each column). - Text Color
Enter a validly formatted color value (Hex, RGB, or RGBA) or click the color chip to open a full-featured color picker. - Background
Enter a validly formatted color value (Hex, RGB, or RGBA) or click the color chip to open a full-featured color picker. - Background Image, Repeat, and Fixed
Click the Browse button to select your background image. Then select a Repeat option or set the image to be fixed (so it does not scroll with the page). If you select Fixed, the Repeat option will become disabled and the proper CSS will be written to the appropriate LBM style sheet. - Padding
Enter a padding value (20px, for example) in shorthand CSS syntax. A single value will assign the designated padding value to all 4 sides. Two values will assign the first value to the top and bottom, and the second value to the left and right. Enter four values if you wish to assign different values to each of the 4 sides. - User Class
The User Class box allows you to set a custom class of your own creation on your selected LBM element. You can even add multiple classes. To do so separate each class name with a single space.
Note: When creating or assigning your own classes you must be mindful not to use the letters lbm in the CSS selector name.
Column Wrapper Settings and Options
In the above screen capture, a Column Wrapper is selected, which makes certain options available, while others become disabled. When a Column Wrapper is selected, the available options are:
- Column Wrapper Width
Choose from several max-width options or leave it set to Auto. Max-width options will also ensure that your column layout is centered. - Font Stack
Choose a font stack for the selected column wrapper only. - Font Size
Set a font size for text within the selected column wrapper. - Text Color
Enter a validly formatted color value (Hex, RGB, or RGBA) or click the color chip to open a full-featured color picker. - Background
Enter a validly formatted color value (Hex, RGB, or RGBA) or click the color chip to open a full-featured color picker. - Background Image, Repeat, and Fixed
Click the Browse button to select your background image. Then select a Repeat option or set the image to be fixed (so it does not scroll with the page). If you select Fixed, the Repeat option will become disabled and the proper CSS will be written to the appropriate LBM style sheet. - Padding
Enter a padding value (20px, for example) in shorthand CSS syntax. A single value will assign the designated padding value to all 4 sides. Two values will assign the first value to the top and bottom, and the second value to the left and right. Enter four values if you wish to assign different values to each of the 4 sides. - User Class
The User Class box allows you to set a custom class of your own creation on your selected LBM element. You can even add multiple classes. To do so separate each class name with a single space.
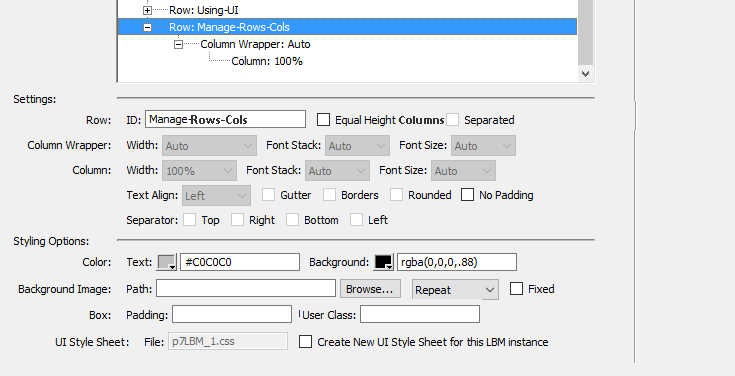
Column Settings and Options
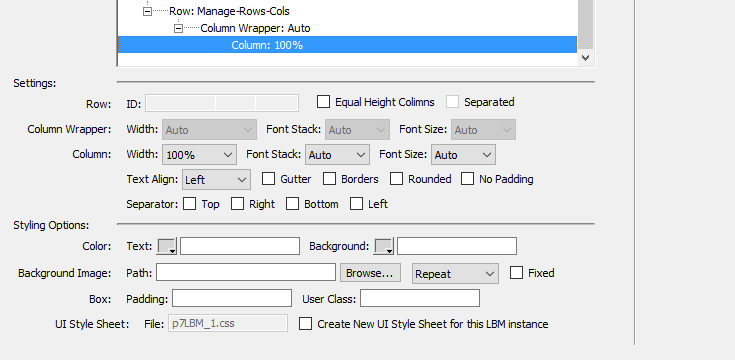
In the above screen capture, a Column is selected, which makes certain options available, while others become disabled. When a Column is selected, the available options are:
- ID
Enter an ID for the selected column. - Column Width
Choose from several available percentage widths or leave it set to Auto if you will be having only one column in the selected column wrapper. Make sure that the widths for all of the columns in the selected column wrapper equal 100%. - Font Stack
Choose a font stack for the selected column only. - Font Size
Set a font size for text within the selected column. - Text Align
You can set the text alignment for the selected column. Choose from Left, Right, or Center. - Gutter
Gutters work in concert with Borders, by providing space between columns so that borders on adjacent columns stay separate. - Borders
Selecting borders will assign a 1px solid border around your column. The border color will match the text color assigned to that column. - Rounded
Set rounded corners on your column. The rounded corners will appear if you have borders set. They will appear without borders being set if you have assigned a background color to the selected column. - No Padding
Check this box to set your column to have zero padding on all 4 sides.
Note: If the first element inside your column is a paragraph or heading, you need to set zero margin on that heading or paragraph to prevent an adjacent margin gap. Another option would be to use the Padding box to enter a 1px top/bottom margin and a zero left/right margin. - Separator
Separators are 1px vertical lines that can be set to appear on the top, right, bottom, or left sides of the selected column. - Text Color
Enter a validly formatted color value (Hex, RGB, or RGBA) or click the color chip to open a full-featured color picker. - Background
Enter a validly formatted color value (Hex, RGB, or RGBA) or click the color chip to open a full-featured color picker. - Background Image, Repeat, and Fixed
Click the Browse button to select your background image. Then select a Repeat option or set the image to be fixed (so it does not scroll with the page). If you select Fixed, the Repeat option will become disabled and the proper CSS will be written to the appropriate LBM style sheet. - Padding
Enter a padding value (20px, for example) in shorthand CSS syntax. A single value will assign the designated padding value to all 4 sides. Two values will assign the first value to the top and bottom, and the second value to the left and right. Enter four values if you wish to assign different values to each of the 4 sides. - User Class
The User Class box allows you to set a custom class of your own creation on your selected LBM element. You can even add multiple classes. To do so separate each class name with a single space.
CSS Information
Layout Builder Magic uses 4 style sheets. Here is how they work.
p7LBM-Core.css

This style sheet contains the core CSS rules that LBM uses. This style sheet should NEVER be modified or edited in any way. And under no circumstances should you ever edit an LBM core rule using Dreamweaver's CSS Designer.
p7LBM-Custom-01.css
This style sheet contains utility classes that you can assign to any element inside your LBM layout. While this file can be edited, or added to, you should do so with caution. Always make a backup before making edits. It's always better to be safe than sorry.
p7LBM_1.css
This is the CSS file that works in tandem with the styling options in the LBM interface. Do not edit this file—EVER. When you create an LBM layout the first time, the system will create a p7LBM_1.css file. If you create a second LBM instance on the same page, the system will create a file named p7LBM_2. This ensures that each LBM instance has its own UI-related style sheet, which prevents conflicts. If you create a new LBM instance in the same folder that contains a page with another LBM instance, the system will create a CSS file with an additional underscore: p7LBM_1_1.css, in order to prevent conflicts.
p7LBM_DT.css
This is the special CSS file that allows your columns to display in Dreamweaver Design View. Do not edit this file. LBM contains an internal Design Time CSS Tool that runs automatically to assign the DT style sheet to your page when you first use the LBM interface on that page. You need not even think about it.
Note: If you create a page copy using File > Save > As, or if you are using Dreamweaver Templates (DWT) and create a new page from a template, simply run the LBM interface one time on your new page to establish a link between your page and the LBM Design Time CSS file.
Create New UI Style Sheet

The UI style sheet is a special CSS file used by the LBM interface to manage style options you set inside the LBM interface. There could be situations in which you need to add a new UI style sheet specific to a particular LBM instance. For instance, when you create a copy of a page using File > Save As.
Let's say you design a page using Layout Builder, then, as some of our customers do, you create additional pages by saving copies...instead of using Includes or DWTs. Now, you have a three-column structure, with the center column blue, on your pages, which is fine, but you want to change that column to red on just one of your pages. You open the UI and change it. The column is now red, but when you open another page, you find that all the center columns, on all your pages, are now red. It's not what you wanted. So, this feature allows you to create a new style sheet, which is built by polling the UI in its current state. The new style sheet, becomes a copy of the original style sheet (which is still attached to other pages), allowing to make CSS exceptions.
CSS Utility Rules You Can Use
There are several classes, in either the Core or Custom style sheets, that you can assign to any element on your page. This is a convenience and allows for efficient styling.
.lbm-centered
Assign this class to any element to center the text inside.
.scalable
Assign this class to any image you wish to make responsive.
.scalable-rounded
Make images scalable while also rounding their corners.
.scalable-fancy
Make images scalable while also rounding their corners and assigning a subtle drop shadow.
.bigg
Bump font-size to 180% for any element.
.text-link-light
Assign this class to text links to override the browser default for links. This class is designed for links over dark-colored backgrounds.
.text-link-dark
Assign this class to text links to override the browser default for links. This class is designed for links over light-colored backgrounds.
.video-wrapper
If you would like to make an iFrame-based video responsive, wrap the iFrame inside a DIV, then assign the video-wrapper class to the DIV. For example:
<div class="video-wrapper">
<iframe width="1280" height="720" src="https://www.youtube.com/embed/YAcLViTHDOo" frameborder="0" allowfullscreen></iframe>
</div>
.map-wrapper
Deploy as you do the video-wrapper class above, except your iFrame will contain the embed code for a Google Map.
RGBA Colors
When setting background colors, there will be times when you want to set the color to be semi-transparent, using RGBA color syntax. Depending on your version of Dreamweaver, you will have access to three different styles of color-picker screens. While Adobe is not often lauded for its interface design, the picker included with Creative Cloud versions is the easiest to use. The screen looks like this:
For Creative Cloud Versions
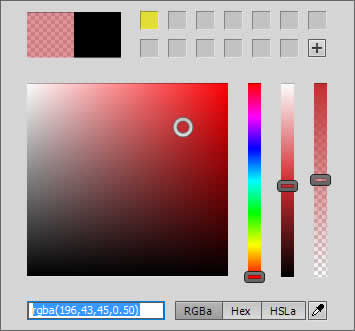
When the color-picker opens, simply click the RGBa button. From there, you can set your color and transparency levels using the sliders You can also use the eyedropper to select a color from your page.
CS6 Color Picker
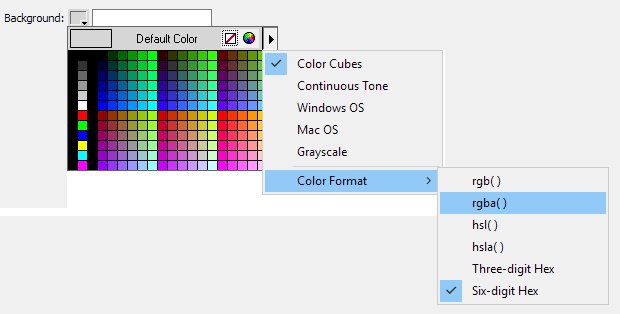
Click the right-pointing flyout arrow. Choose Color Format > rgba()
Legacy Color Picker
Click the rainbow icon...
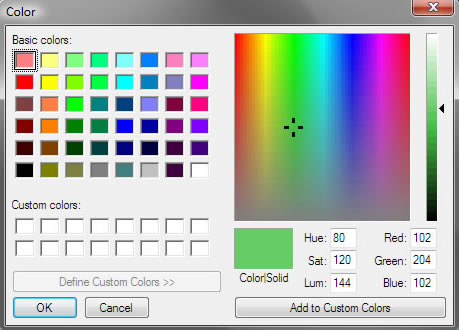
Jot down the Red, Green, and Blue values on a sheet of paper. Then format your rule like this, adding the Alpha value, as a decimal, after the Blue value:
rgba(102,204,102,0.75)
Layout Builder Magic Tools
Layout Builder Magic tools are a growing collection of utilities that you can use to enhance your pages and make them more responsive.
LBM Tool: Insert/Modify Images
The Insert/Modify Images tool gives you a quick, intuitive way to insert images into your LBM page and make them scalable, all at the same time. To use the tool...
Click on your page where you would like the image to be inserted
Click the Insert/Modify icon ![]() on your insert bar or panel:
on your insert bar or panel:
1. Insert Bar
![]()
2. Insert Panel
3. Insert Menu
Tip: You can also right-click to access the PVII Layout Builder insert menu.
A Select Image window will open. Select your image and click OK
The Layout Builder Insert/Modify interface will open...
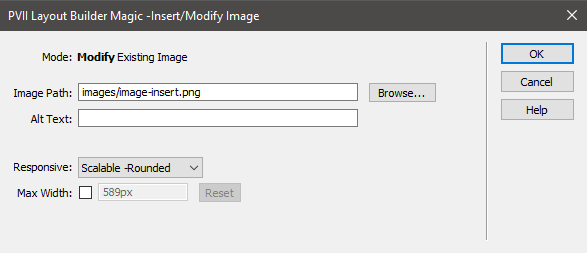
Add Alt Text if you want. If you leave the Alt box blank, an empty Alt attribute will be added to your image's <img> tag
Responsive Option
Select a Responsive option. The choices are:
![]()
Set a Max Width
If your image is being inserted inside an Equal Height Columns (EHC) row, the Max Width option will be set and a value equal to the natural width of your image will be automatically entered into the box. Advanced users may edit this value if needed, but the defaults should be appropriate in nearly all cases.
![]()
If you change the default supplied Max Width value and need to reset it, use the Reset button.
Editing or Changing an Image With LBM Tools
You can change an image at any time by selecting the image and clicking the Insert/Modify icon ![]() on your insert bar or panel. The UI will open and you can change image source, responsive options, or Max Width options.
on your insert bar or panel. The UI will open and you can change image source, responsive options, or Max Width options.
Note: The LBM Insert/Modify Images tool works for any image on your page, even for images that were originally inserted using Dreamweaver's ordinary Image Insert function.
Support Options
Before making a support inquiry, please be certain to have read the documentation that came with your product. Please include your Order Number, Dreamweaver version, as well as your computer operating system type in all support correspondence.
Support Forum
PVII maintains a Web Forum community. Go Direct to the Web Forum
E-Mail and Phone Support
E-Mail: support@projectseven.com
Phone: (336) 374-4611
Phone hours are 9:00am - 5:00pm Eastern Time U.S.