SELECTIONS: EZ Knockout Mask
The hardest selections to do are of subjects with complex edges, like frizzy hair, fireworks, a teddy bear, or, like the one you'll practice on, a hairbrush. Unless you have access to software dedicated to extracting objects from images, this can be a painstaking procedure. A method that can be very successful with images like these is to create a mask from the image itself.
- Choose File > Open
- Browse to the PVII_PhotoMagic directory on your hard drive.
- Locate the brush.jpg file and click on it to select it.
- Click on Open
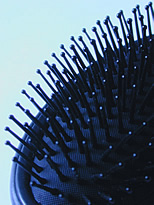
Figure1: The hairbrush photo
The first step in creating a mask from an image is cloning it.
- Click on the image to select it, and then choose Edit > Clone.
- In the Layers panel, click on the hide object icon (eyeball) to temporarily hide the original image.
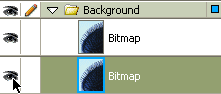
Figure2: Hide the original image
- Click on the clone to select it.
- Choose Filters > Adjust Colors > Invert.
- Choose Filters > Adjust Colors > Hue/Saturation
- Move the Saturation slider all the way to the left
- Choose Filters > Adjust Color > Brightness/Contrast.
- Move the Brightness slider to about 62, and the Contrast slider to about 47.
The idea is to get it as close to a black and white image as possible, while preventing the edges from becoming too hard. There are some little dots of black in the center of the brush that you can paint out. Leaving the gray and white area at the bottom, left of the photo will create a translucency that will be very useful for blending the brush into any background color or image you add.
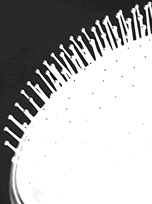
Figure3: The image converted to black and white
- Click on the Bitmap Brush tool to select it.
- In the Property inspector, click in the Stroke Color fill box to open the Swatches pop-up.
- Click on the White swatch to select it.
- Set the Stroke size to around 20, the Stroke type to Soft Rounded, and the Stroke edge to 10.
- Paint out the black dots in the middle of the bush.
- Paint out any gray splotches in the middle of the brush.

Figure4: The bitmap Brush tool
You are ready to create your mask group.
- In the Layers panel, click in the space next to the original bitmap to unhide it.
- Press Shift and click on the thumbnails for both images.
- Choose Modify > Mask > Group as mask.

Figure5: The masked brush
Voila! You should be pretty impressed with yourself. :-) Let’s have some fun with a background.
- Choose Modify > Canvas Color.
- Click in the Fill Color box of the Canvas Color dialog box to open a Swatches pop-up.
- Click on the white swatch.
Next, you’ll add a jazzy image.
- Choose File > Import
- Browse to the PVII_PhotoMagic directory on your hard drive
- Locate the joli.jpg file and click on it to select it.
- Click on Open
- Click on the canvas with the Import cursor.
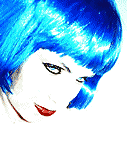
Figure6: Ms Joli
You’ll need to move the image behind the brush mask group.
- In the Layers panel, double click on the name Bitmap next to the thumbnail for the imported image.
- Type the name Joli into the text box that opens.
- Press Enter to accept the name and close the text box.
- Click on the Joli thumbnail and drag it below the mask group thumbnails.
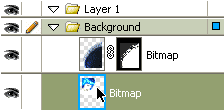
Figure7:Drag the Joli image below the mask group
To reduce the size of the joli image,
- Choose Modify > Transform > Numeric Transform
- Set the transform type to Scale
- Scale the image to 50% of its present size.
To position the imported image,
- Click on the Joli thumbnail to select the image.
- Use your arrow keys to move the image up and to the left.
To add an air of mystery and imply some depth, Joli’s face should be slightly overlapped by the bristles of the brush.
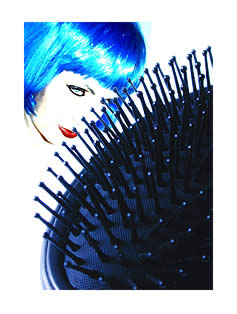
Figure8: Woman of mystery