PVII Omni Panels
Omni Panels magically adapt to all screen and window sizes automatically
Using Layout Builder Magic Inside Omni Panels
When you have the finest panel widget for Dreamweaver, it's only natural that you use the finest layout building tool when you need to add multiple columns. Layout Builder Magic allows you to easily add as many columns as you like to your Omni Panels. And if that's not enough, it also gives you the power to add, delete, or change the order of your columns.
This tutorial requires the latest version of Omni Panels. To update Omni Panels go to the OPM Updates Page, check to see if you have the latest version installed. If you need to update, be sure to follow the instructions.
Step 1: Prepare Your Omni Panels Widget
- Open an existing page or create a new one. Create an Omni Panels widget on the page. You can also use an existing Omni Panels widget.
- Decide on the panel you wish to convert to a multi-column structure
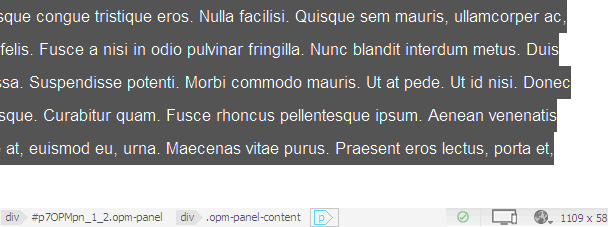
- Delete the boilerplate paragraph that Omni Panels added to your panel, ensuring that you remove the actual paragraph tag. The best way to do that is to use the Tag Selector Bar at the bottom of your Dreamweaver window:

- Place your cursor inside the paragraph text, then click the
 marker on the Tag Selector Bar
 - Press your Delete key to delete the paragraph.
- Leave your cursor in the space formerly occupied by the paragraph and proceed to the next step
Note: You can also delete the paragraph in Code View if you are comfortable in that environment.
Step 2: Insert an LBM Structure inside your Omni Panel
With your cursor still in the space formerly occupied by the Omni Panel placeholder paragraph, open the LBM UI to insert your LBM column structure.
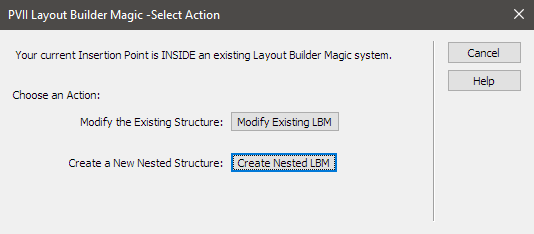
If your page is built using LBM, then you will see an intermediary window asking if you would like to modify the existing LBM structure, or create a new one:

Click Create Nested LBM to open the main LBM UI

Set up your row and column structure, choosing whatever options you desire. They will all work flawlessly.
Repeat the above steps to add LBM structures to any or all of your remaining Omni Panels.
Step 3: Remove padding inside Omni Panel
By default, the Omni Panels widget contains padding inside each content panel. You might like the way it looks with this padding, or you might want to remove it, letting the Layout Builder system control the padding. To turn off the padding in your Omni Panel:
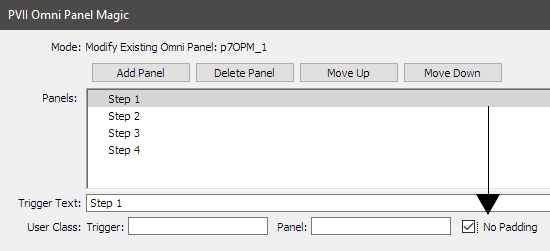
- Click inside your widget and open the Omni Panel UI
- Select the panel you wish to affect.
- Enable (check) the No Padding option.
 ]
]
That's it. Congratulations on a job well done.