Maxi Menu Magic Custom Color SetsThe Incredibly Megalicious Menu Builder for Dreamweaver
Buy Now | User Guide | Examples | Tutorials Home | Product Home
Let's start with a little pink
We default p7MXM-01.css file includes a custom color theme class called Custom-Links-Pink. The theme is assigned as a Root Menu User Class in the main MXM UI.
To assign the Pink theme to an existing menu, place your cursor inside the menu and open the MXM UI.
Switch to the Styling Options tab.
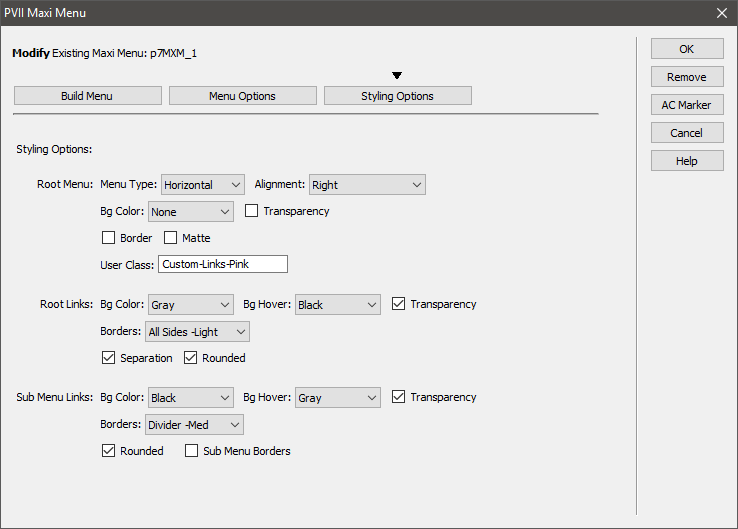
Enter the class name Custom-Links-Pink in the User Class box, then Click OK.
Adding More Themes...
Creating More Color Sets
Open the p7MXM-01.css file.
Make a new line at the end of the file and paste in the following CSS:
 /*

        ******************

        MY-Theme

        ******************

        */


        /*Root Links*/

        .p7MXM.My-Theme a.mxm-root-link {

        background-color: rgb(140,204,0);

        color: #FFF;

        }

        .p7MXM.My-Theme a.mxm-root-link:hover,

        .p7MXM.My-Theme a.mxm-trigger.open,

        .p7MXM.My-Theme a.mxm-maxi-trigger.open {

        background-color: rgb(250,230,30);

        color: #000;

        }


        /*Root Current Mark*/

        .p7MXM.My-Theme .mxm-root-ul a.mxm-root-link.current_mark {

        font-weight: bold;

        }


        /*Sub Menu*/

        .p7MXM.My-Theme .mxm-sub-menu,

        .p7MXM.My-Theme a.mxm-sub-link {

        background-color: rgb(250,230,30);

        color: #000;

        }

        .p7MXM.My-Theme a.mxm-sub-link:hover,

        .p7MXM.My-Theme a.mxm-maxi-trigger.open,

        .p7MXM.My-Theme a.mxm-sub-link.mxm-trigger.open {

        background-color: rgb(140,204,0);

        color: #FFF;

        }


        /*Sub Menu Current Mark*/

        .p7MXM.My-Theme .mxm-sub-menu a.mxm-sub-link.current_mark {

        font-weight: bold;

        }
Use Find and Replace to find the words My-Theme and replace them with the name for your theme.
Change the background-color and color properties to suit.
Create as many themes as you want!
To deploy your new theme, enter its class name into the User Class box in the Styling Options tab of the MXM UI, just as you did when deploying the Pink theme.
Applying a Gradient Effect
A subtle gradient can add elegance to your menu. Here is the CSS:
        .p7MXM.my-gradient a.mxm-root-link {background-image: linear-gradient(180deg, rgba(255,255,255,0.25), rgba(255,255,255,0.0));}

          .p7MXM.my-gradient a.mxm-sub-link {background-image: linear-gradient(90deg, rgba(255,255,255,0.0), rgba(255,255,255,0.25));}
Copy the above 2 CSS rules and paste them into your p7MXM-01.css file.
To deploy, set my-gradient as the Root Menu User Class in the MXM UI.
This gradient effect will work with any color themes you set for your menu!
Measured against other menu building tools, Adaptive Menu Magic simply has no equal. PVII tools make Dreamweaver better.