Convert existing PMM2 menu to PMM3PVII is the leader in creative extensions for Dreamweaver
Your existing PMM2 menu can be automatically converted into a PMM3 menu with just a few clicks. It couldn't be easier. Let's explore the process.
Auto-Convert an Existing PMM2 Menu
To convert an existing PMM2 menu into a PMM3 menu:
Place your cursor inside the existing PMM2 menu
Click the PMM3 icon ![]() in the PVII Section of Dreamweaver's Insert Bar or Insert Panel
in the PVII Section of Dreamweaver's Insert Bar or Insert Panel
Classic Dreamweaver Insert Bar

Note: The Creative Cloud version of Dreamweaver does not have an option to show the classic Insert Bar. This Insert Panel Tutorial will show you how to turn on the Insert Bar in Dreamweaver CC.
Dreamweaver Insert Panel

Note: You can also open the PMM3 UI by choosing Insert > Studio VII > Pop Menu Magic 3 by PVII
A converter dialog will open.
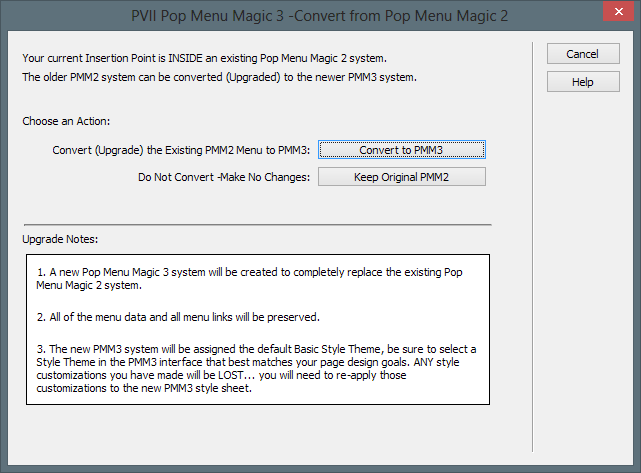
Read the Upgrade Notes and follow the onscreen instructions.
Click the Convert to PMM3 button or to cancel, click Keep Original PMM2.
If you choose to Convert, the main PMM3 UI will open. The Mode will indicate that you are converting an existing PMM2 menu and will list its ID.
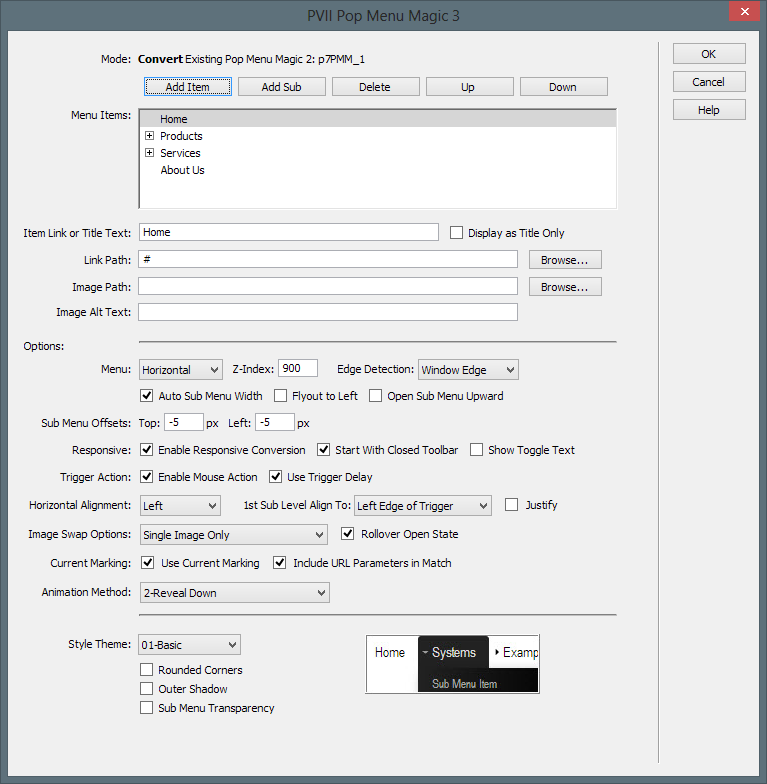
The menu item names and links from your PMM2 menu will appear in the UI. Select the options you want and a style theme.
That's it. Your page now has been upgraded to contain a PMM3 menu. The original PMM2 menu has been thoroughly removed from your page.
Click OK to complete the conversion.
Note: Enable Responsive Conversion
The responsive features of PMM3 are meant to work in a responsive Web site.
The Enable Responsive Conversion option, which is enabled by default, should be disabled (unchecked) if your page is not responsive. If you are new to responsive design and not yet able to create your own responsive pages, you might be interested in our responsive page-building tools.
Note: Menu Styling
Custom colors and style attributes from your PMM2 menu cannot be converted as PMM3 features modern CSS techniques not available when PMM2 was released. Choose a PMM3 style theme that comes closest to your design requirements. Once the menu is converted, you can edit the PMM3 CSS to customize your menu's appearance. Please see the PMM3 Style Guide for guidance. If you need further assistance, PVII Support can assist.