Before and After with Magic Box
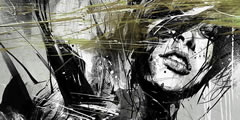
Magic Box is a truly versatile presentation tool. Let's your creativity flourish. Think outside the box. Let your inner artist show through! In this showcase, we've used Magic box to create a series of before and after image presentations. Click the thumbnails below to see what we did. We think you'll really like it.


How we did it...
Note, completing this tutorial requires MBX version 1.2.1
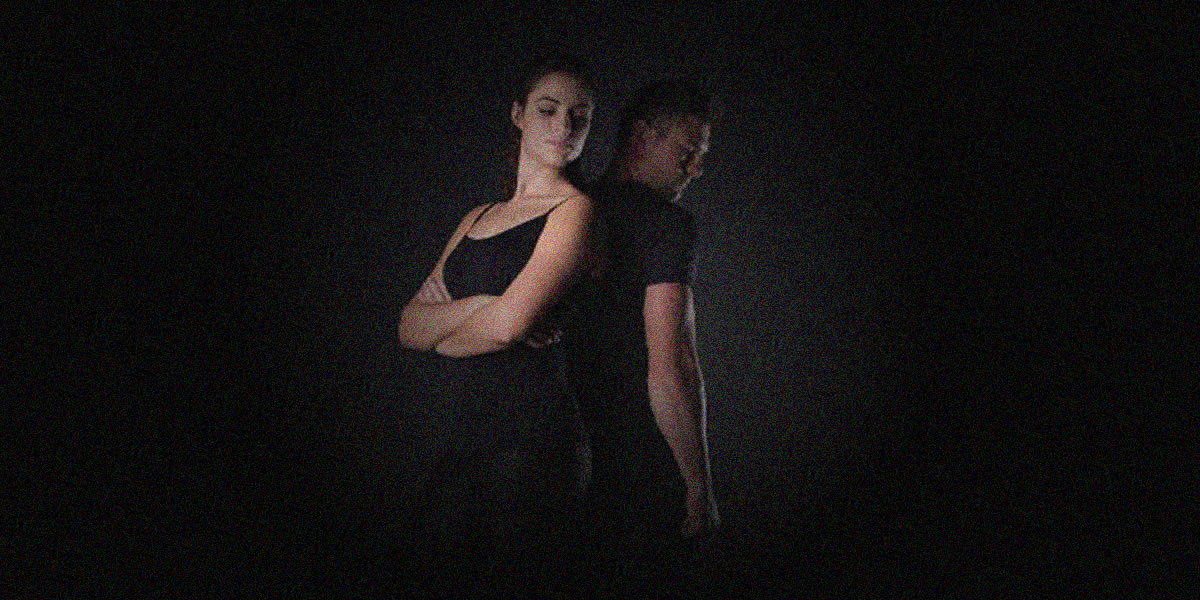
The goal was to create 6 before/after sets. Each set consists of 3 images: before, after, and compare. Each set uses a Magic Box instance for display. We need thumbnails, full-size images, and a way to build a navigation bar to select the images in each Magic Box show.
1. Create or select images, and then process thumbnails
The before and after full-size images are selected and, if necessary, edited and optimized. Use your favorite image editor to make a composite image, containing a side-by-side view of both the before and after images. The last image-based task will be to process thumbnails from your after images. Make sure you save these images in a folder within your defined Dreamweaver site.
2. Insert your thumbnails on the page, and then style them
Insert your images one by one. After inserting the first one, press enter at the end of the line to create a new paragraph. Each of your thumbnails should be inside a paragraph tag. Select all the paragraphs and click the unordered (bulleted) list icon on your property inspector. Your code should look something like this:
<ul class="t-matrix">

<li><img src="peeps/thumbs/peeps-01.jpg" width="240" height="120" alt=""></li>

<li><img src="peeps/thumbs/peeps-02.jpg" width="240" height="120" alt=""></li>

<li><img src="peeps/thumbs/peeps-04.jpg" width="240" height="120" alt=""></li>

<li><img src="peeps/thumbs/peeps-05.jpg" width="240" height="120" alt=""></li>

<li><img src="peeps/thumbs/peeps-06.jpg" width="240" height="120" alt=""></li>

<li><img src="peeps/thumbs/peeps-08.jpg" width="240" height="120" alt=""></li>

</ul>
Add a class of t-matrix to the UL tag. Then add the following rules to your page CSS file... not the MBX CSS file:
.t-matrix, .mb-desc-links {

margin: 0px;

padding: 0px;

text-align: center;

}

.t-matrix li, .mb-desc-links li {

list-style-type: none;

display: inline-block;

}
Make sure that the link to your page style sheet, in the head of your document, comes after the link to your MBX style sheet.
Add your Magic Box Galleries...
Now it's time to build your galleries. It's best to set your insertion points in Code View to ensure a valid insertion. Switch to Code View and locate the closing body tag near the end of your document:
</body>
Make a new line above the tag and place your cursor on that line. Then...
Open the MBX interface
Set Caption to Overlay Bottom
Set Description to Above
Uncheck Thumbnails
Add your three images
Set the Caption for the first image to Before; the second to After; and the third to Compare
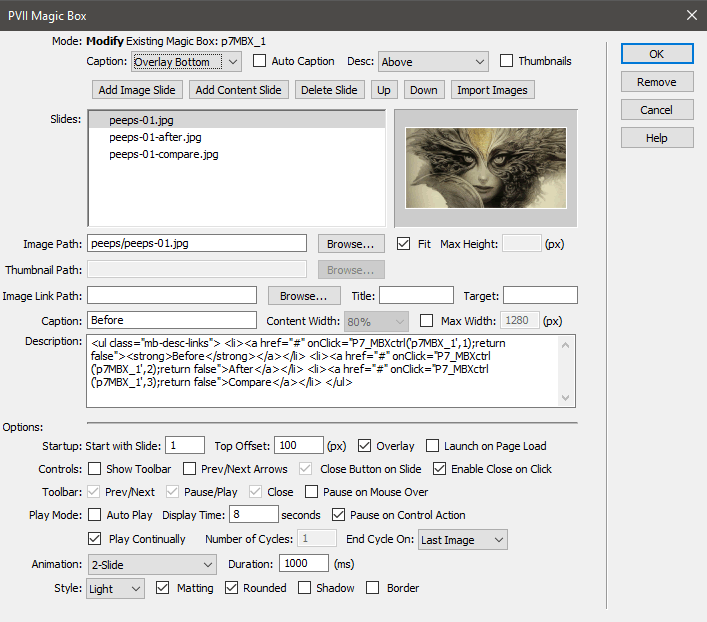
Now the fun part. Copy the following code and paste it inside the description box for each image:
<ul class="mb-desc-links">

<li><a href="#" onClick="P7_MBXctrl('p7MBX_1',1);return false"><strong>Before</strong></a></li>

<li><a href="#" onClick="P7_MBXctrl('p7MBX_1',2);return false">After</a></li>

<li><a href="#" onClick="P7_MBXctrl('p7MBX_1',3);return false">Compare</a></li>

</ul>
Note that the first link, the word Before is set to strong (bold). This is a current marker. When you paste the above code into the Description box for the second image, you will remove the strong tag from the Before link and place one around the After link:
<ul class="mb-desc-links">

<li><a href="#" onClick="P7_MBXctrl('p7MBX_1',1);return false">Before</a></li>

<li><a href="#" onClick="P7_MBXctrl('p7MBX_1',2);return false"><strong>After</strong></a></li>

<li><a href="#" onClick="P7_MBXctrl('p7MBX_1',3);return false">Compare</a></li>

</ul>
In the Description box for the third image, you will move the strong tags around the Compare link.
Set your remaining MBX options, using the above screen capture as a guide.
Build your remaining Magic Box galleries
Build your remaining galleries so that there is one gallery for each of your thumbnails. To establish your insertion points for the remaining galleries, use Code View. Locate the ending bod tag again, make a new line above it, and use the new line as your insertion point.
Adjust the Control Behaviors in your Description box
Each time you create a new gallery, you will need to make a minor adjustment to the UL you paste into the Description box. For instance, you will paste this code into the Description box for the first image in your second gallery:
<ul class="mb-desc-links">

<li><a href="#" onClick="P7_MBXctrl('p7MBX_1',1);return false"><strong>Before</strong></a></li>

<li><a href="#" onClick="P7_MBXctrl('p7MBX_1',2);return false">After</a></li>

<li><a href="#" onClick="P7_MBXctrl('p7MBX_1',3);return false">Compare</a></li>

</ul>
The first value inside the first set of parentheses is the ID of your current MBX gallery. You will need to change the ID to reference the second MBX. The ID above is:
p7MBX_1
Change each of the 3 instances of the ID to:
p7MBX_2
Perform this task for each new gallery. And do not forget to move the strong tags to the relevant link.
Turn your Thumbnails into Magic Box triggers
Your next task is to convert each of your thumbnails into an MBX trigger.
Select the first thumbnail and then click the MBX Trigger icon ![]() on your insert bar or panel:
on your insert bar or panel:
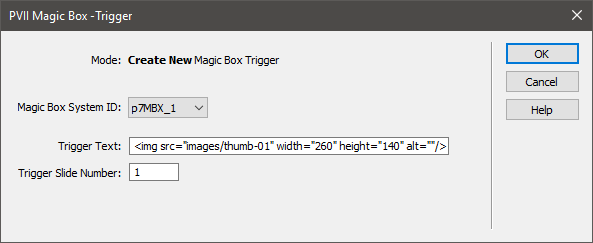
The Magic Box System ID list will contain the IDs for every Magic Box instance on your page. p7MBX_1 relates to the first gallery you created; p7MBX_2 to the second, and so on.
Trigger Text will contain the path to your thumbnail. Do not edit it.
Trigger Slide Number is where you enter the slide you want to show when you launch the gallery. In most cases you will want to leave this at 1.
Click OK to complete the Trigger assignment
Repeat for each of your remaining thumbnails
Add the remaining custom CSS rules
Add the CSS rules below to your page style sheet, below the rules you entered previously:
.mb-desc-links a {

display: block;

padding: 10px;

text-decoration: none;

background-color: #181818;

color: #BBB !important;

border-radius: 5px;

transition: all linear .25s 0s;

}

.mb-desc-links a:hover {

background-color: #3A758A;

color: #000 !important;

}

.mb-desc-links strong {

color: #53A5C8 !important;

}

.p7MBX-01.light .mbx-caption { color: #000; font-weight: bold; }

.p7MBX-01 .p7mbx-ex {

top: 20px;

right: 10px

}
That's it!
Preview your page and bask in the glow of a job well done.